Network Analysis Malware Compromise
Network Analysis - Malware Compromise
Scenario
A SOC Analyst at Umbrella Corporation is going through SIEM alerts and sees the alert for connections to a known malicious domain. The traffic is coming from Sara’s computer, an Accountant who receives a large volume of emails from customers daily. Looking at the email gateway logs for Sara’s mailbox there is nothing immediately suspicious, with emails coming from customers. Sara is contacted via her phone and she states a customer sent her an invoice that had a document with a macro, she opened the email and the program crashed. The SOC Team retrieved a PCAP for further analysis.
What’s the private IP of the infected host
Step 1
Launch pcap file on Wireshark by double clicking on the file. Note: Make sure Wireshark is installed before this

Step 2
We should start by looking at the network traffic composition.This would give us a high level overview of the network which would direct our investigation flow. To do that we would look at the protocols then the conversations. First let’s look at the protocols (“Statistics > Protocols”)
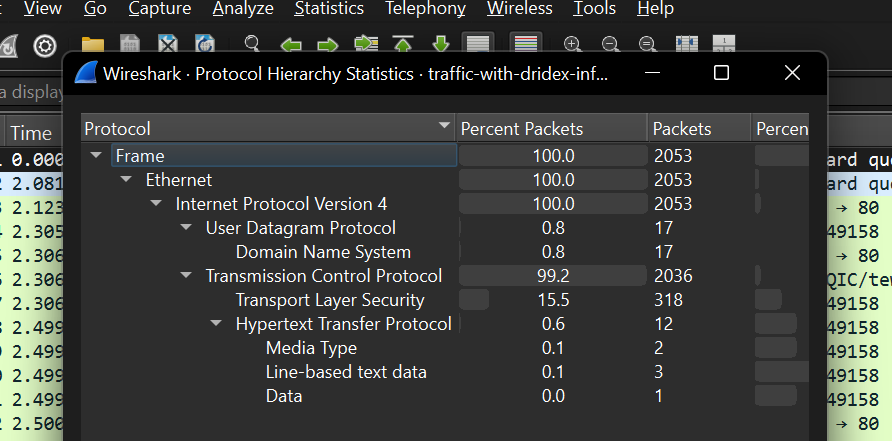
From the image above, we notice UDP, DNS, TCP, HTTP, Media, Line-based and Data
Then we look at the conversations to see which IP’s are communicating in the network. Go to “Statistics > Conversations”, then switch to the IPv4 tab
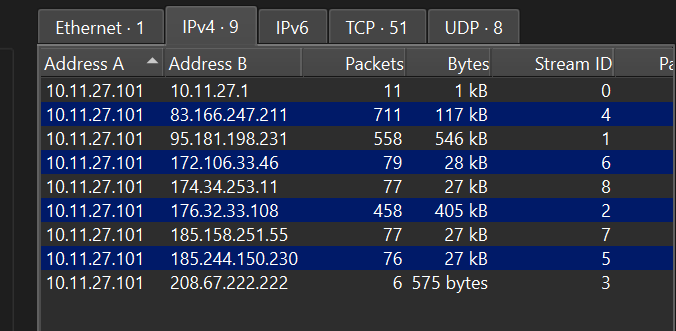
Based on the information here, the pcap seems to have been dissected beforehand (filtered to remove unnecessary information) leaving only conversations related to 10.11.27.101 We can immediately see that 10.11.27.101 is communicating with various other IP addresses, so it’s safe to say that 10.11.27.101 is Sarah’s IP address.
Answer: 10.11.27.101
What’s the malware binary that the macro document is trying to retrieve
Step3
In the scenario description, connections to the known malicious domain were a recent anomaly meaning the domains haven’t been visited in the past. When you visit a domain for the first time your browser checks whether the domain’s IP has been cached, if not, a DNS request is sent to a DNS server where this information is retrieved. Now there are also types of DNS records: A, AAAA, CNAME, MX etx. The one we need is the A record which maps the domain name to the IP address. Exiting the conversations and looking at the packet list panel we can filter on DNS A record (using: dns.a ).

Klychenogg[.]com 95.181.198.231
cochrimato[.]com 176.32.33.108
mautergase[.]com 83.166.247.211 Note: Remember to defang when taking notes to avoid clicking on malicious links by mistake
Step4
Let’s start by using virus total to ascertain the reputation of the domains
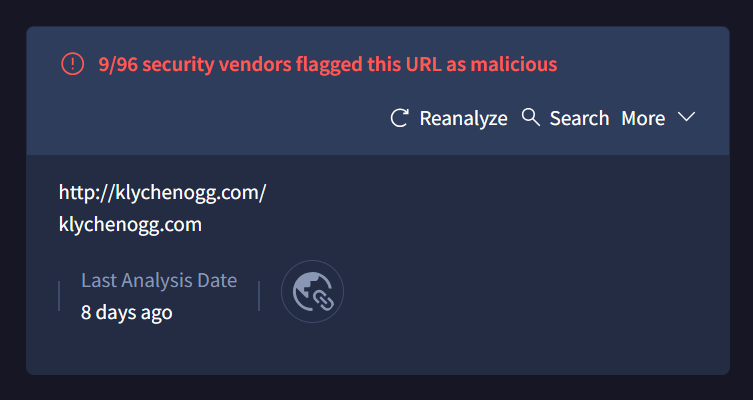
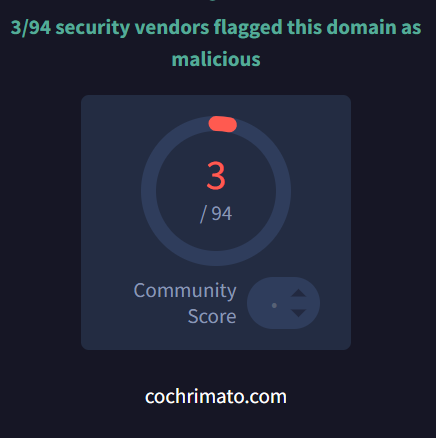
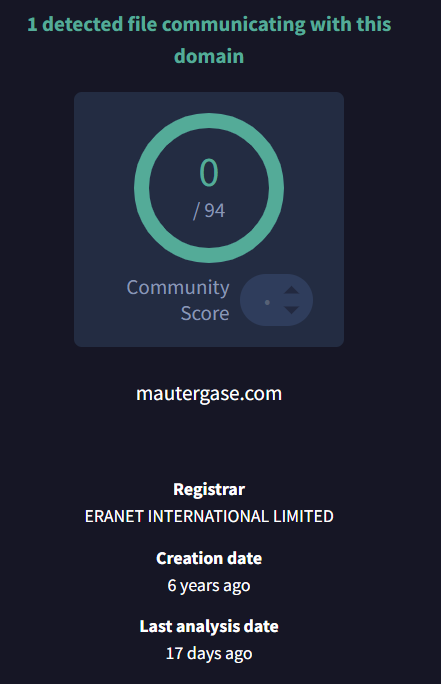
2 domains apart from mautergase is flagged malicious by virus total. we can start our investigation from there
Step5
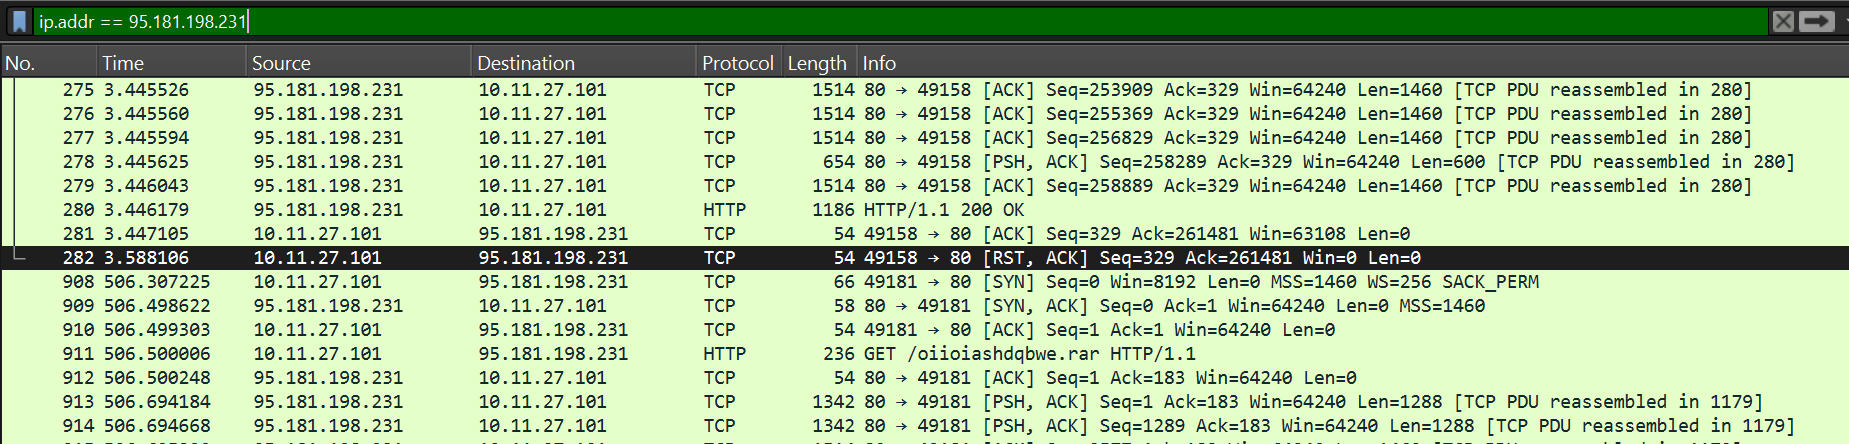
Let us Investigate the malicious domains in detail starting with Klychenogg[.]com 95.181.198.231. Let’s filter using the IP. In the filter bar type “ip.addr == 95.181.198.231” (This filter shows only packets related to the specified IP address)
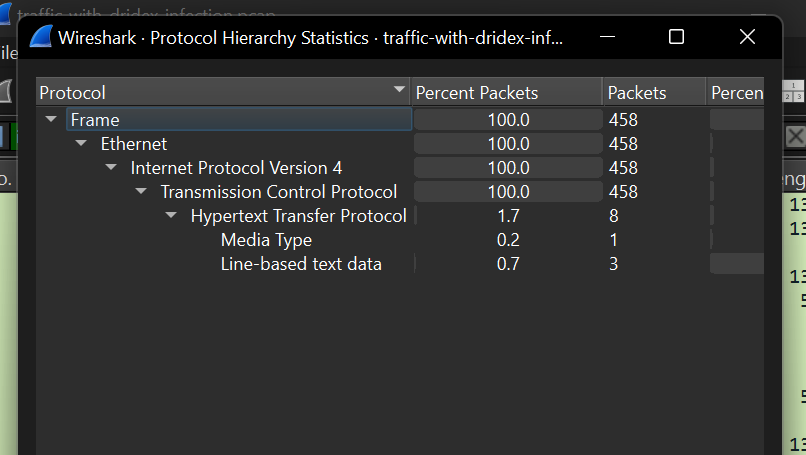
Then go to “Statistics > Protocol Hierarchy” to see a high-level overview of the network traffic composition(protocols) of 95.181.198.231’s activity
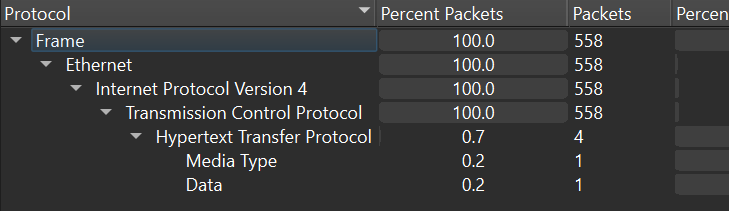
Things that are of note are that the activity involved 558 TCP packets, 4 HTTP packets, 1 Media Type packet and 1 Data type packet
Step 5a
Let’s view the details of the 4 HTTP packets. Adjust the filter to: “ip.addr == 95.181.198.231 && http” (adding “&& http” basically filters to only HTTP packets related to the IP specified)

The First packet shows a Get request to the domain requesting a resource with a specified query string “?1=spet10.spr”
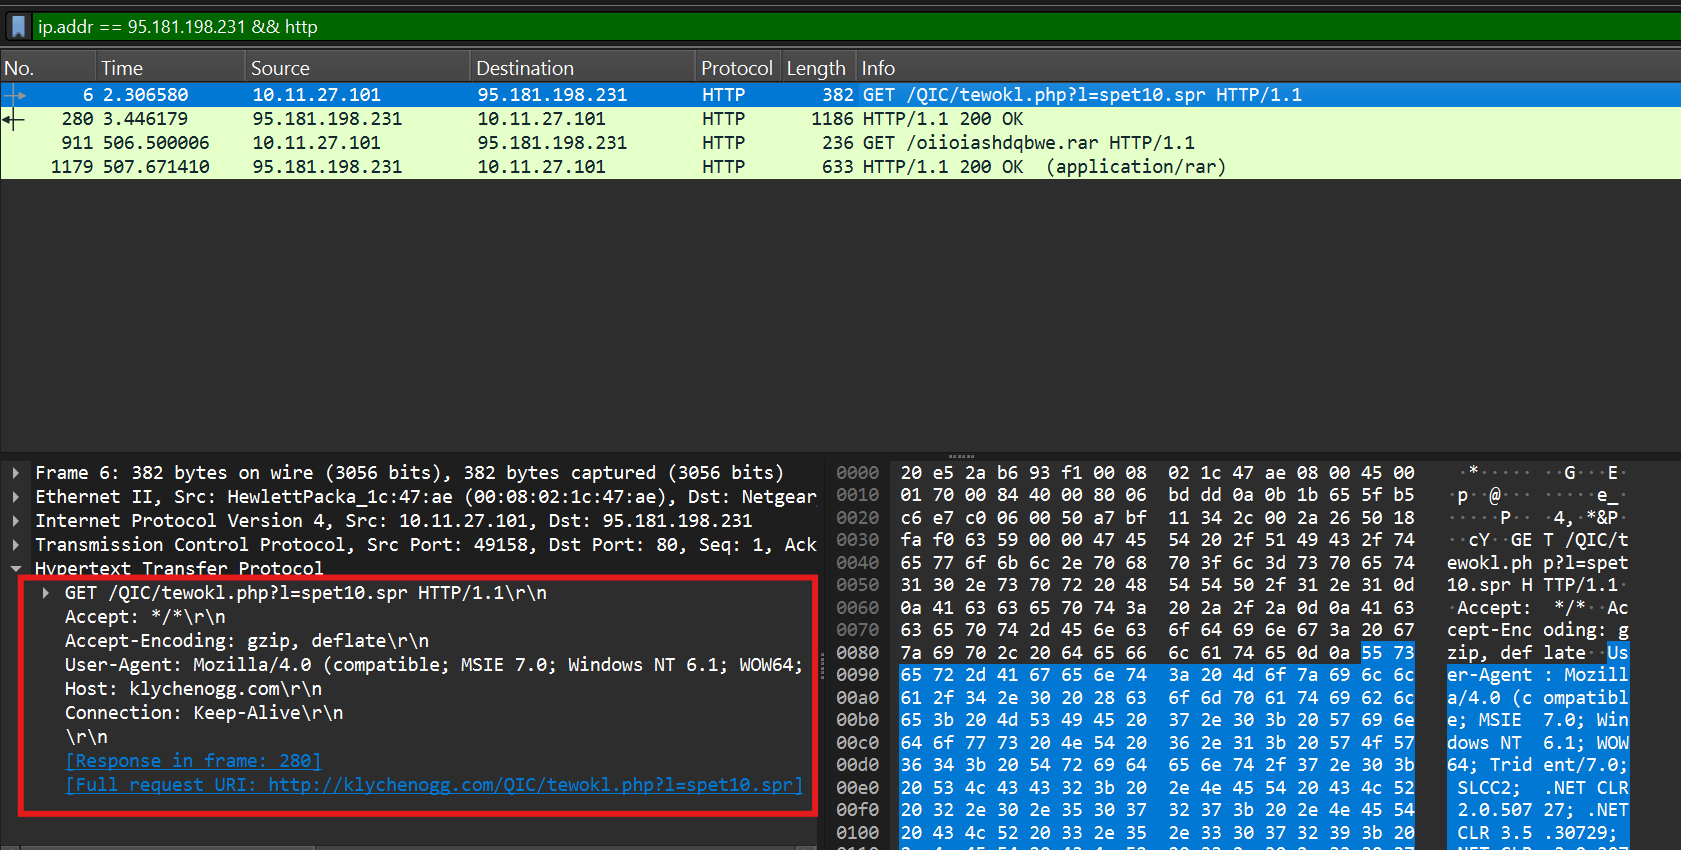
Based on the second packet the query string above specified the file to be downloaded
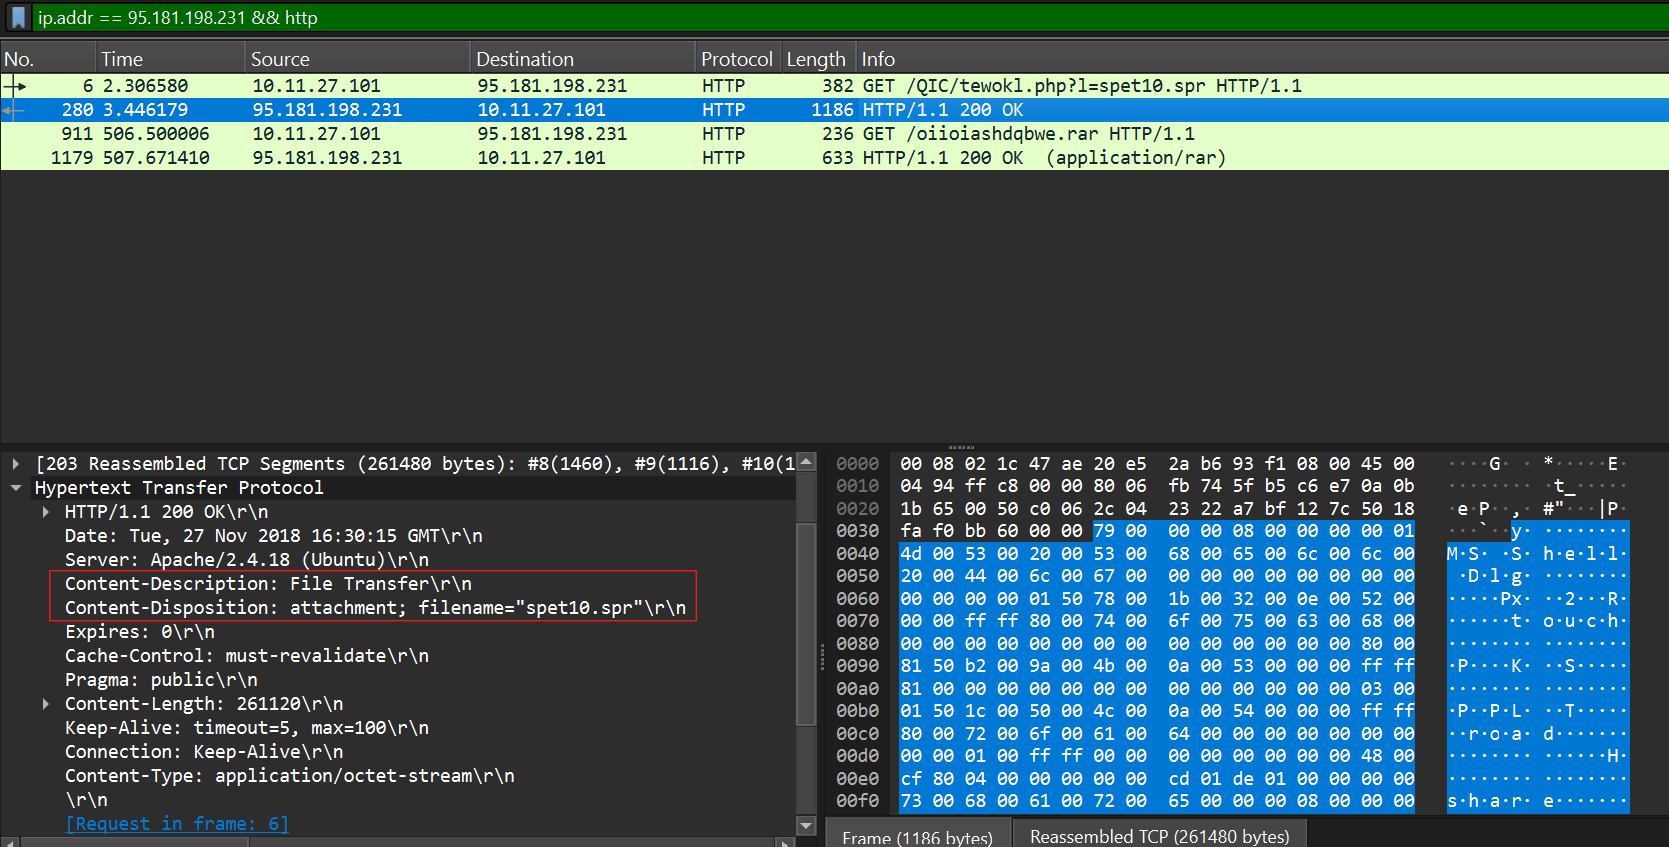
investigating further by scrolling on the packet details panel, right click one on the “Data” drop down > Show packet bytes you should see “This program cannot be run in DOS mode”, this suggests the file is a windows binary.
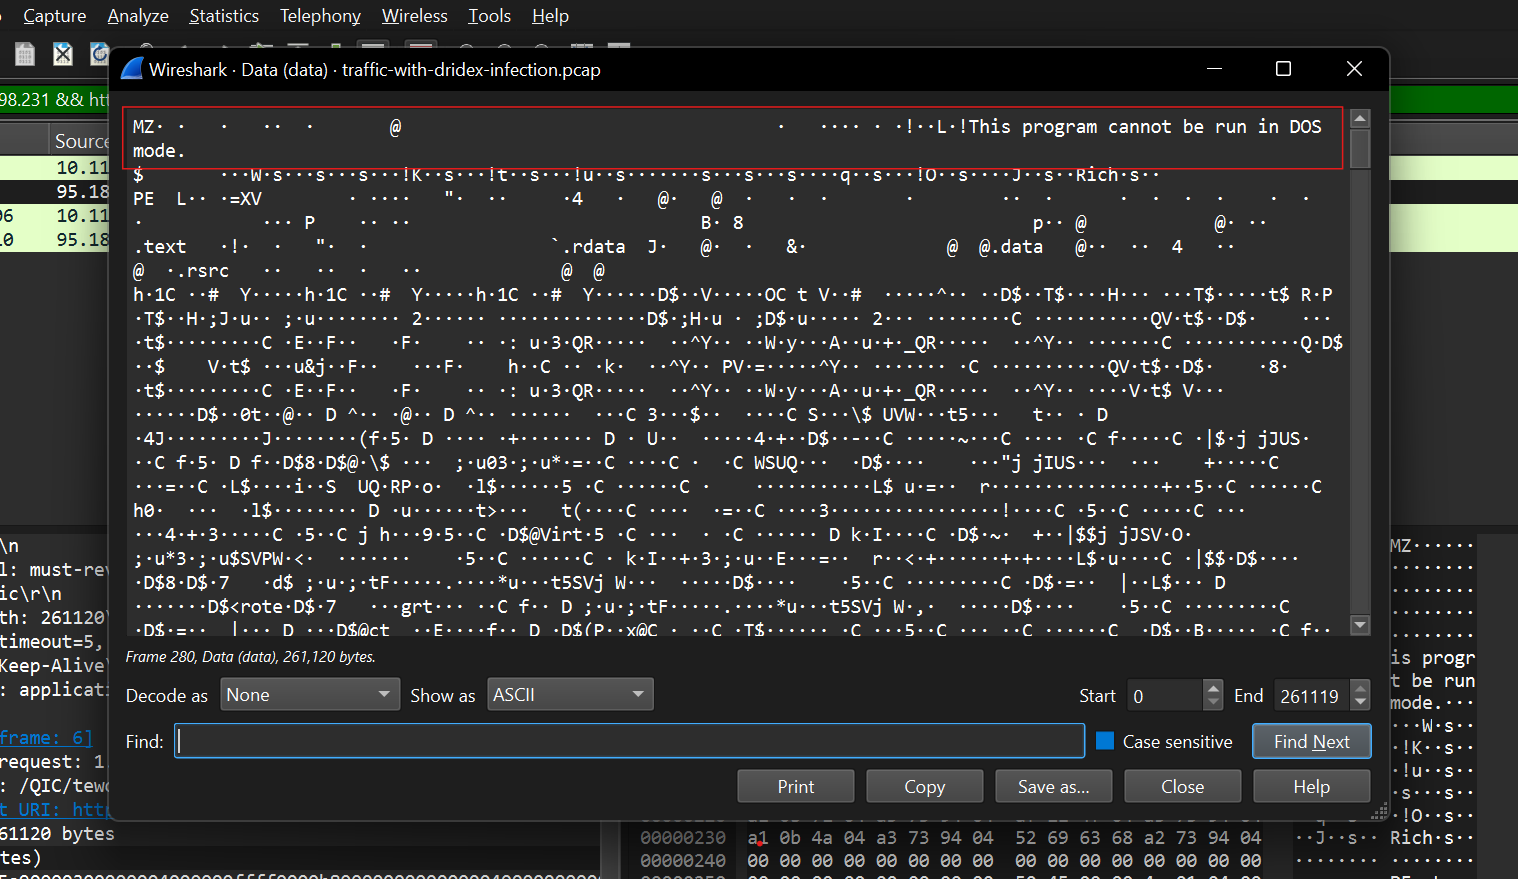
you can confirm this by exporting file(Right click > Export Packet bytes )
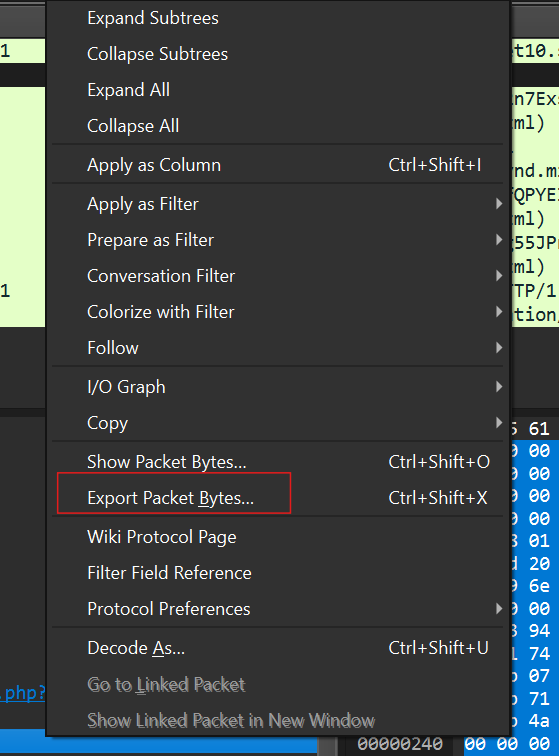
Then using ExifTool view the file metadata
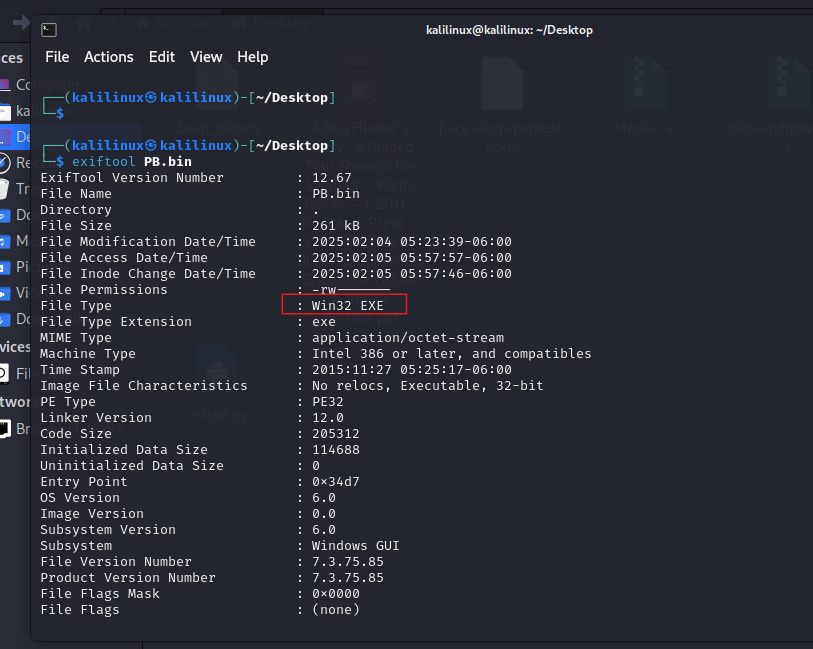
You could also grab the sha256 hash of the file using sha256sum

Then check the file’s reputation and other details using VirusTotal
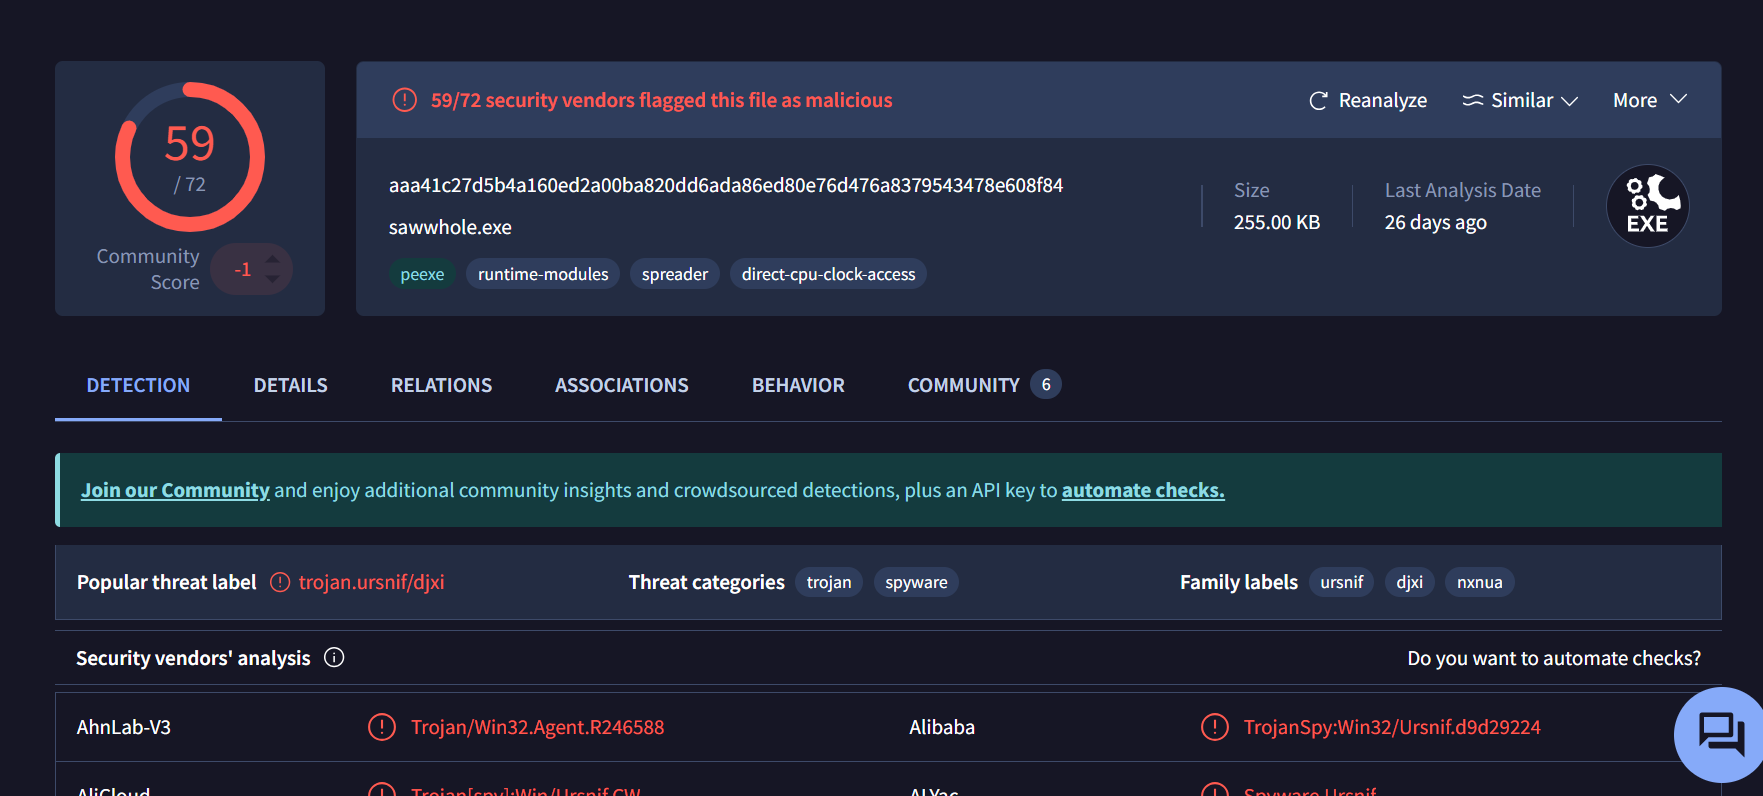
Answer: spet10.spr
The SOC Team found Dridex, a follow-up malware from Ursnif infection, to be the culprit. The customer who sent her the macro file is compromised. What’s the full URL ending in .rar where Ursnif retrieves the follow-up malware from?
Step 5b
Moving on, the third packet requests oiioiashdqbwe.rar, a file archive and the fourth packet responds 200 ok signifying the download.
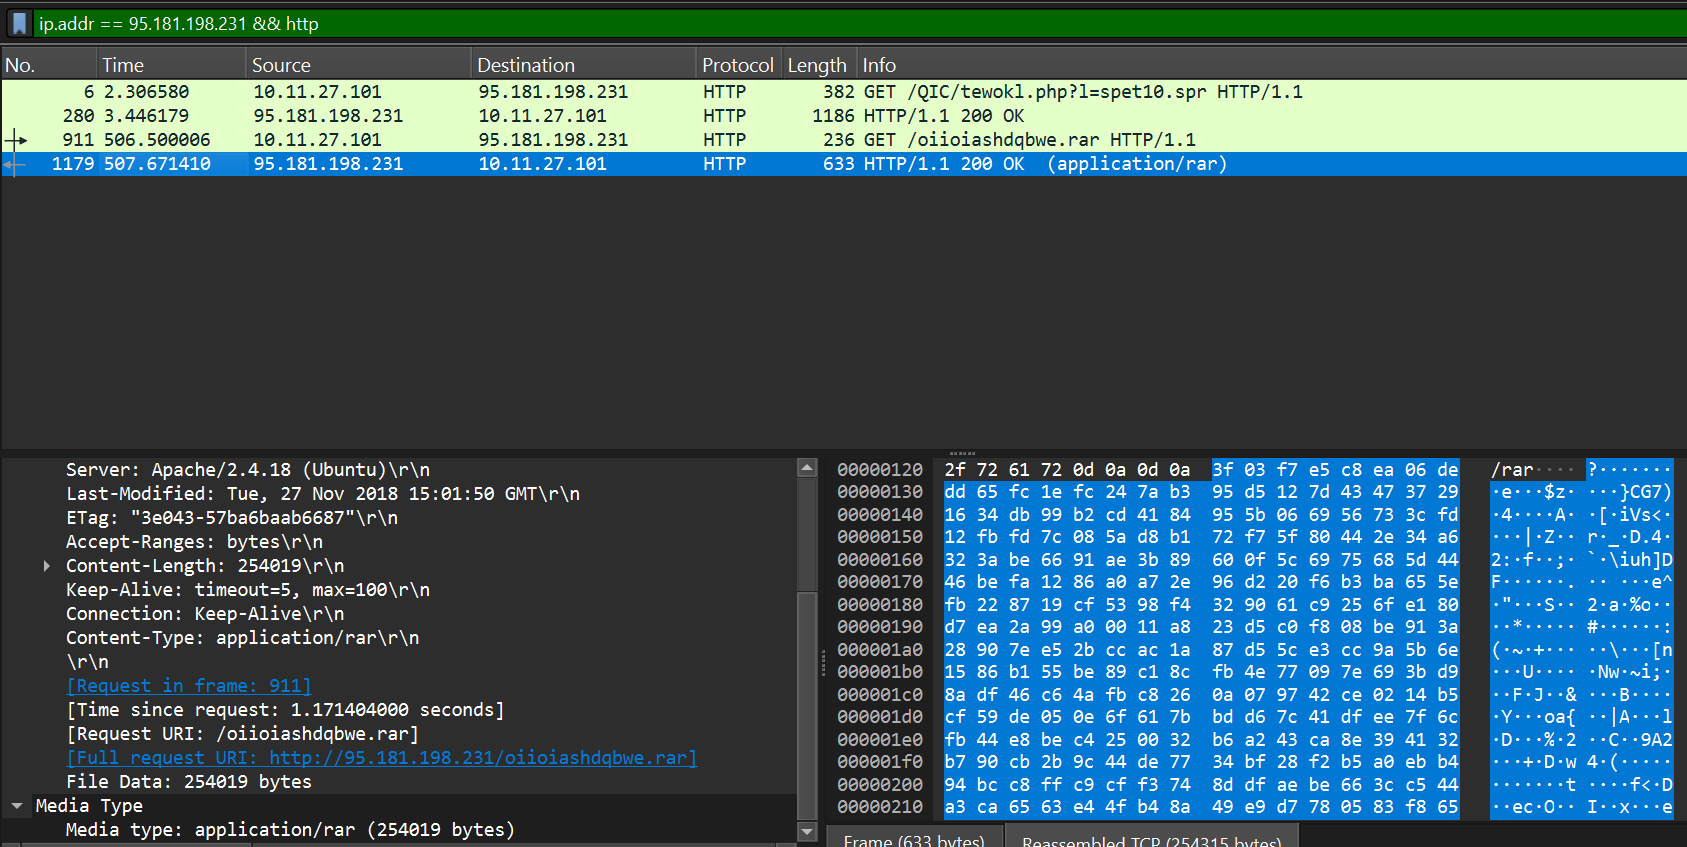
Answer(defanged): http://95.181[.]198.231/oiioiashdqbwe[.]rar
From what domain HTTP requests with GET /images/ are coming from?
Step 6
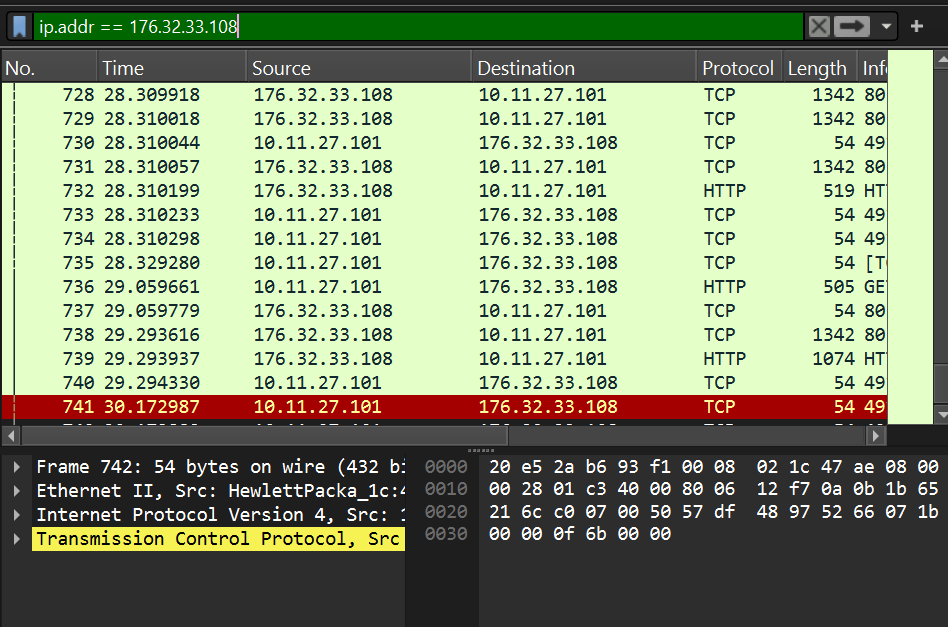
Investigating the second domain cochrimato[.]com 176.32.33.108. Filter on the IP address using “ip.addr == 176.32.33.108”
Open the protocol hierarchy to see the network traffic composition(protocol)
We notice TCP, HTTP, Media type and Line-based text data
Lets investigate HTTP traffic adjust the filter to ip.addr == 176.32.33.108 && http to see http traffic related to the specified IP
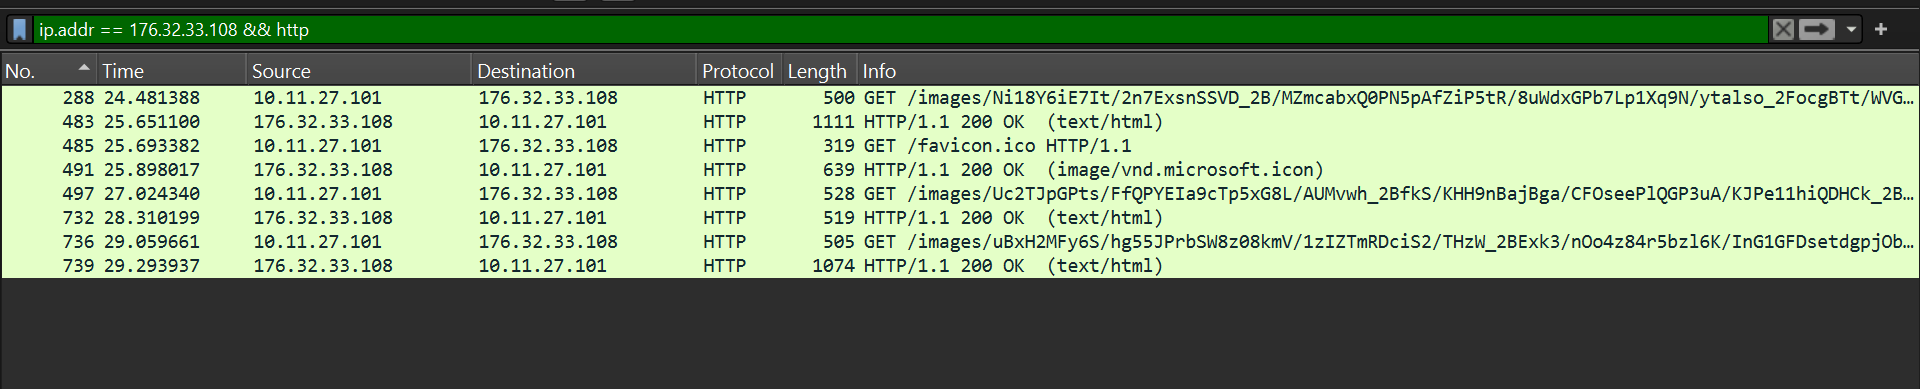
4 Get requests, 3 requesting .avi files in and received files in text/html content type and one requested favicon.ico and received an image.
Answer: cochrimato[.]com
What is the Dridex post-infection traffic IP addresses beginning with 185.?
Using the hint of “185.” that was given, we look at the conversations to see how many IP addresses fit the criteria
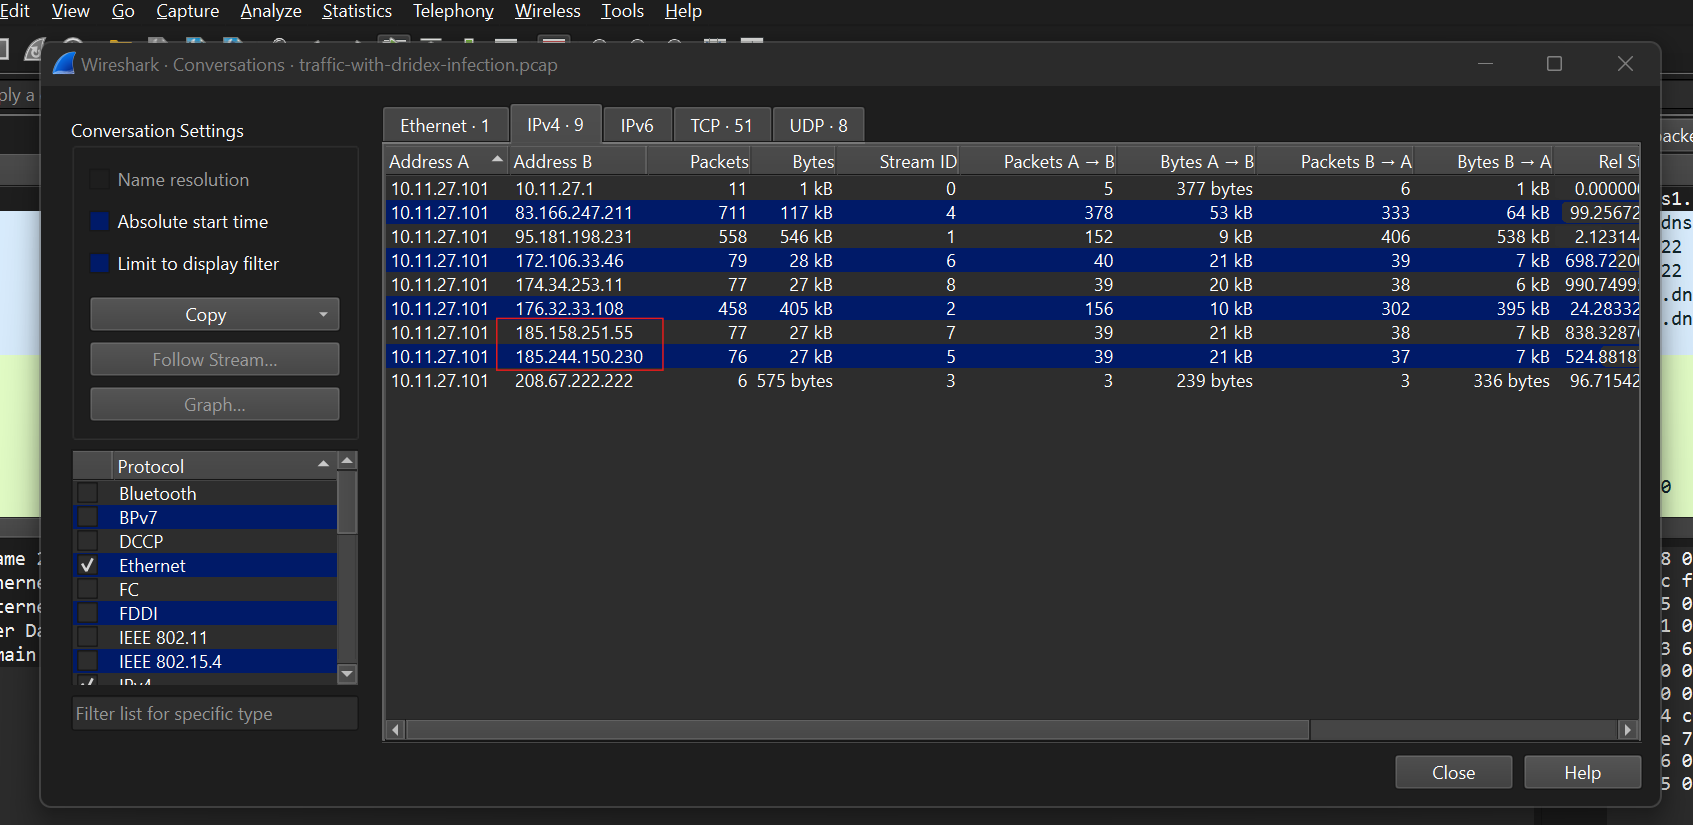
Two IP addresses fit the criteria 185.158.251.55 and 185.244.150.230 We can google to understand dridex better and get indicators to be able to pin point which one is dridex ‘s address
According to this article Wireshark Tutorial: Examining Dridex Infection Traffic patterns in SSL/TLS certificate issuer fields can be a key to identifying dridex. Dridex certificate issuer fields frequently has random strings with a number or two sometimes thrown in. However, values for the country name and city or locality often match.
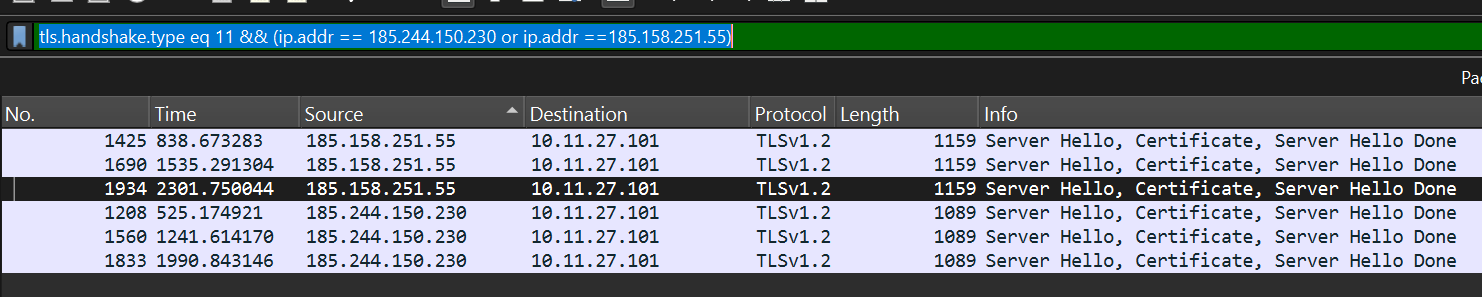
First step would be to filter on TLS certificates of suspected IP’s using the filter “tls.handshake.type eq 11 && (ip.addr == 185.244.150.230 or ip.addr ==185.158.251.55)” tls handshakes messages normally have types and 11 specifies that we want the certificate
Certificate issuer fields for 185.158.251.55 above

We notice that the country name, IT and Locality name, Rome is correct, the other values seem to be random. The same also applies to 185.244.150.230
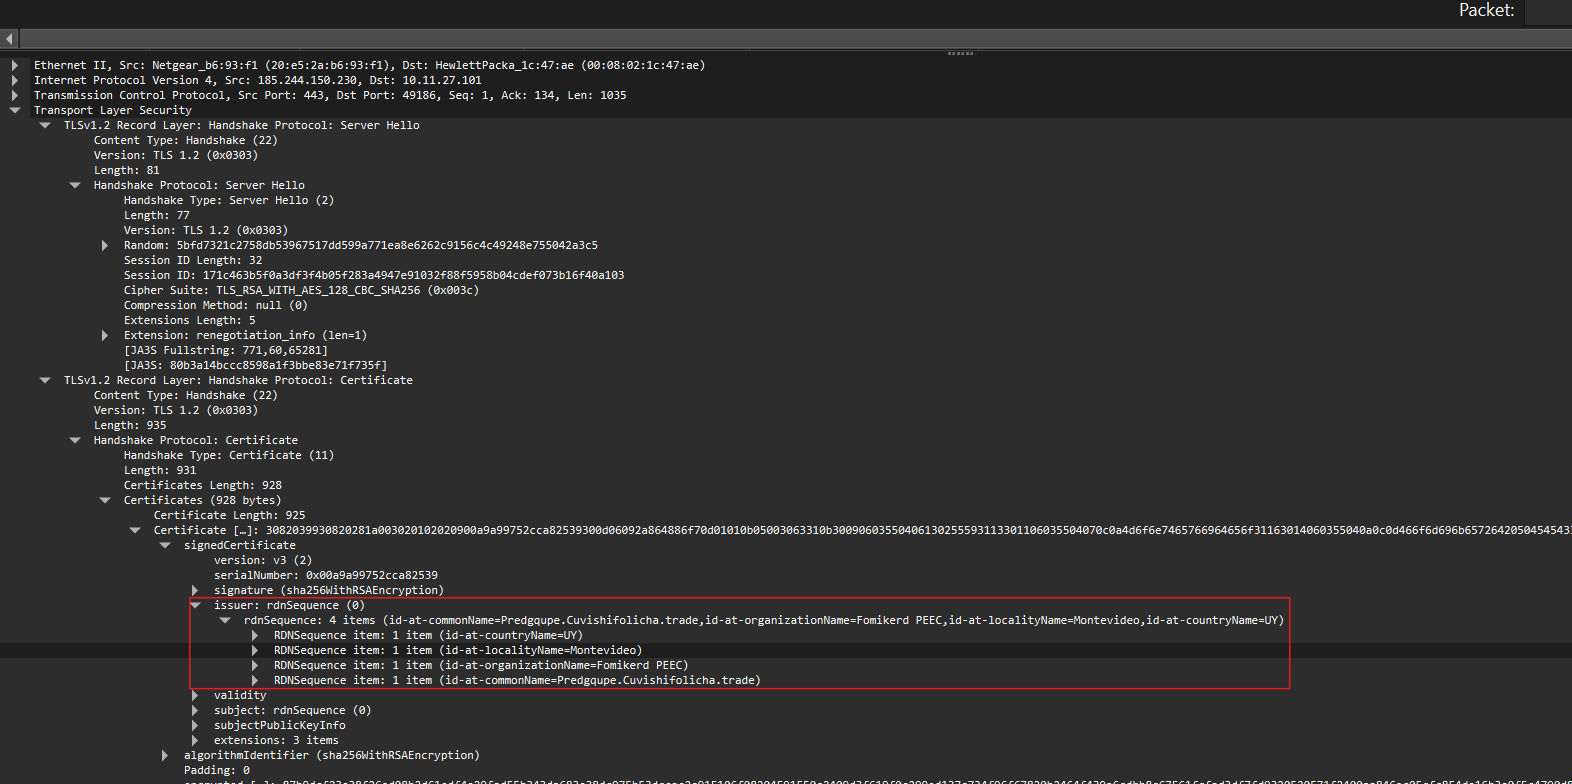
Both IP seem to be Dridex.